 I wrote an article on this subject in the Autumn 2014 Quilter’s World issue.
When deciding on the 12 steps to successful quilt making, I knew precision cutting had to be one of them. The only question was which ranking it would have.
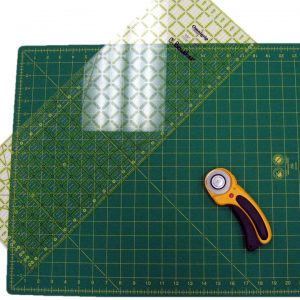
Here are a few key elements to ensure that you have precision cutting:
- Always use a 45mm rotary cutter and ensure that the blade is sharp. Have extra well-sharpened blades always close by. If the blade you are using is dull but not damaged you can sharpen it, so keep it in a container labeled TO SHARPEN so you can remember for later as you need to stay focus on the task on hand.
- Always trim back to have a clean edge every time your fabric shifts or moves. Don’t forget to fold your fabric in half with the fold towards you and the selvage far from you. The fabric should be laying flat on the cutting mat. A good ironing is essential at this stage (See the step on “Good Pressing”). Trimming your fabric enables us to ensure that we are cutting along the straight grain. This will be the only time you have to think about it, the rest of the cuts will automatically take into account the weft and warp. However, you need to ensure that your pattern considers that too…. be careful! Several patterns that promote the fact that they are quick and easy make you cut and sew on bias … it becomes difficult to assemble.
- Always rely on the lines of the ruler and not on the cutting mat. Too often I see students’ waste time positioning their fabrics on the line of the cutting mat. This is not really necessary as we always align our fabrics based on the lines of the ruler. If this bothers you, use the Omnigrid® cutting mat as it can be used on both sides … the gray side has no line so you won’t feel the need to align your fabrics to one. And you will see that several fabrics are easier to see through the ruler on this side.
- Never touch a fabric until all the cutting is done. As soon as you touch the fabric, it moves, unfolds or curves. This means you will miss out on your precise cutting. So ensure you do not touch your strips until they are ready.
- Do not move your ruler while cutting. I love using the Omnigrip® rulers as they have what I call windows to see if the fabrics are precisely aligned. If the fabric isn’t aligned properly than you will miss a few hairlines…. Another reason why I love these rulers is that the green line helps you find the 1/8 and 7/8 that are so hard to find on others.
- Have a good grip on your rotary cutter and keep your wrist straight. I often hear quilters saying that they have tendinitis in the wrist or thumb. This is often due to a poor handling of the rotary cutter. Remember to keep your wrist straight while maintaining a 60 degree angle when cutting. And ensure that your table is at the right height! Calculate 6 inches below your elbow.
- Never cut more than two layers at once. Once again, it is a matter of precision. I am the first to want to finish cutting quickly … but you require precision. However if you have the accuquilt machine then you can cut 6 layers at a time … I LOVE IT!
- Beware of directional fabrics! Take a good look at your fabric before cutting. Is it linear? Directional? You may need to change the cutting instructions to ensure that your fabric looks good in the quilt. So please unfold the fabric and put it up on your design wall (I will talk about the design wall in another blog) and take a good look at it. You might just be surprised!