Do you have a quarter inch foot on your sewing machine?
Do you know where to find the quarter inch of your foot?
These are the two questions I automatically ask any student inquiring about how to achieve a precise seam allowance.
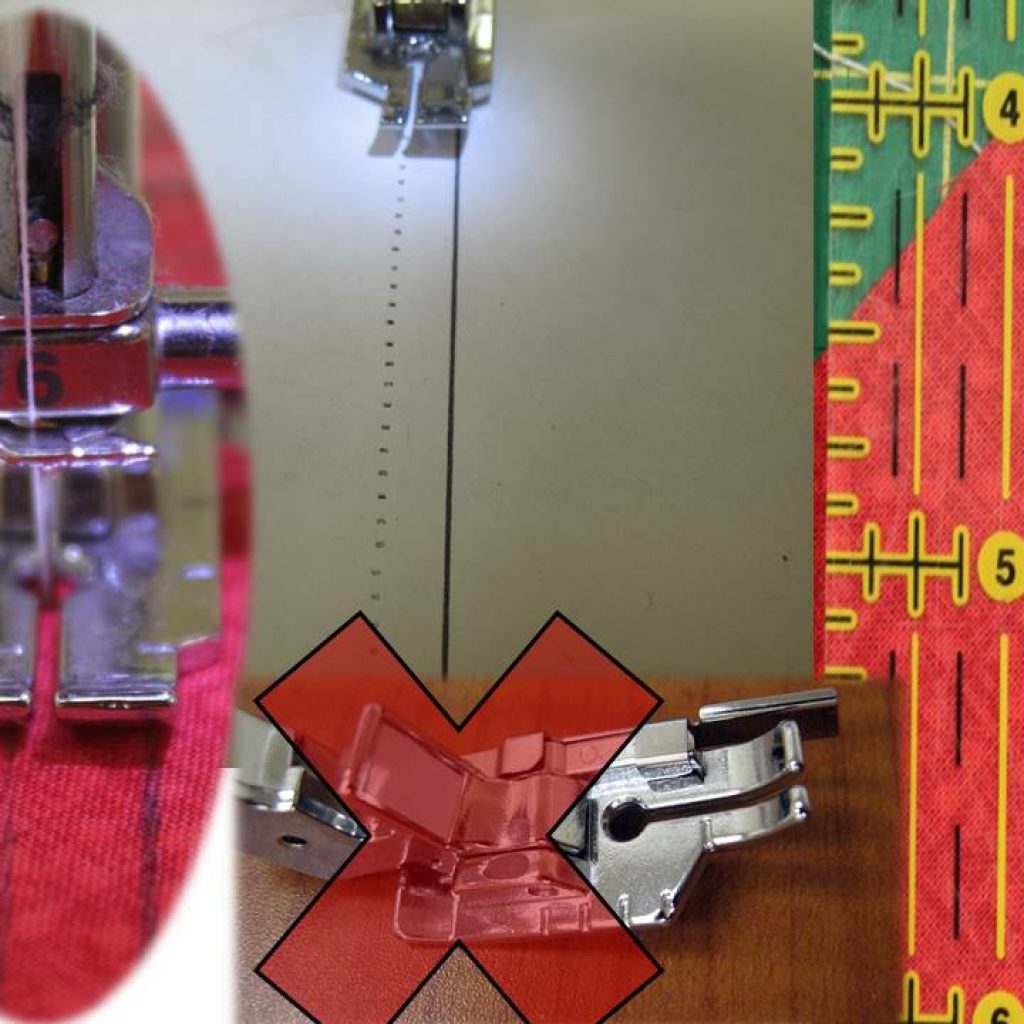 There are many models of quarter inch foot as each sewing machine has their own style. But generally the quarter inch foot consists of a small hole in the middle and a metal sole plate which extends on the front having a width of only one-quarter inch.
The hole indicates where the needle must be. So make sure it is centered in the middle. If your needle is not properly positioned, it will break. Believe me: you’ll prefer a broken needle to ripping seams in your block.
The extension at the front of the foot should measure PRECISELY ¼ “. So go ahead and place your foot on your ruler and look at its size. Several of my customers were surprised to discover that the quarter-inch foot they had bought for their machine actually measured 3/8″.
I also suggest to avoid buying a quarter of an inch foot with guide. It looks like a regular foot with a stick that is supposed to be the quarter inch. You will notice that by using it as a guide, you will push your fabric onto the stick and it will stretch out and you will no longer have an accurate guide.
So choose a good old ¼” foot and test it before starting your project. Draw a line on a heavy stock paper and, with an old needle on your machine, align your foot on the line and make a seam on the paper (without thread). Then go check the distance between the holes and the line. Ideally you want to have your dotted line a hairline within the quarter inch.
That’s when you’ll realize that you have no choice but to learn how to read your foot: should the fabric exceed the soleplate, be aligned right on soleplate or be a hairline inside the soleplate? Once you have done the test, you will know.
And you will have to redo this test each time you sew on a different sewing machine.
I like to compare this step to your first driving experience. We were all wondering how we would know if we were driving in the middle of our lane right? Remember the good old trick we were told? “make sure that the yellow line is aligned to the middle of the hood of the car …. Do not look right outside but far ahead. ” It’s the same thing here … You do not look at the needle but at the alignment of the fabric on the right hand side of the sole.
And the last question? Why be a hairline inside the quarter inch?
If we want to be precise and accurate, we must keep a hairline extra to open and press the fabric. If you work with flannel, you would better keep 2 hairlines as we calculate based on thickness of fabric. But beware! Do not lose too much as we do not want to have a 1/8″ seam because the seam will unravel during the first wash and your quilt will already have a premature wear.
Hope you are enjoying my 12 steps to successful quilt making. Please leave a comment.