 The border is the last strip of fabric that you sew around the entire perimeter of the quilt (not to be confused with the binding). You usually choose the width relative to the thickness of your mattress as it is often added to cover that specific area.
The common mistake at this stage is to cut the border to the length that is written on the pattern rather than checking the actual length of your quilt on hand. And this is why this process is step 8 in the 12 steps to successful quilt making!
Remember Step 6: Taking the right measurements ? Option 2 is:
If your blocks are not accurate, adjust the rest of the pattern as you go along.
For example, if your seam allowance was too wide when making your blocks and you have lost 1/8″ to each block. Once you have assembled your center blocks (let’s say 12 vertical and 8 horizontal) you will have lost almost 1½” vertically and almost 1″ horizontally. This means that your borders need to be shorter, otherwise you will be stuck with puckering fabrics when quilting.
Another example, if your seam allowance was too narrow when making your blocks and you have lost 1/16″ to each block. Once you have assembled your center blocks (let’s say 12 vertical and 8 horizontal) you will have gained almost ¾” vertically and almost ½” horizontally. This means that your borders need to be longer, otherwise your quilt will not lay flat and it will wear prematurely as your fabric is stretching constantly.
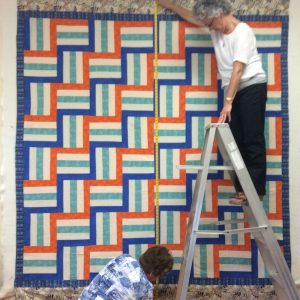
To avoid problems, put your assembled center piece on your design wall (see Point 7 – “Assembling” for details on how to make your design wall) and measure your piece to ensure that you are cutting your borders to the right size.
If you are making a Queen size quilt, YES IT IS BIG, take out the ladder and ask a trusted friend to assist you in positioning correctly the 120″ measuring tape.
Once you have correctly measured and cut the fabric for your border, pin pin it to your piece. This is probably the only time I get out my pins because I hate them, but they are the key to your success.
Don’t keep an extra inch in your fabric “for luck”; trust me: luck has nothing to do with it.
And if you have several borders, you must repeat the steps each time while ensuring that the corners are squared off.
I know all of this sounds terrible, but trust me! You’ll thank me as you will save a lot of time in the long run…. you’ll also see less of your not so friendly seam ripper.
If you are enjoying these steps to successful quilt making, please share with your friends!