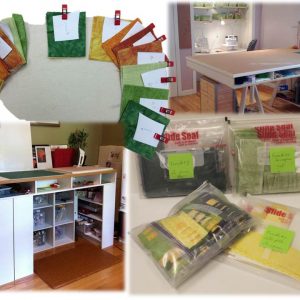
 This is a key element in the 12 steps to successful quilt making.
Believe it or not, 50% of the class content in my beginner’s class in quilt making is developing students organizational skills. If you are not well organized, you won’t succeed in your project.
I strongly suggest putting all the supplies for your project in one box, including the threads, batting and backing. This will ensure that you do not use them on another project.
You should also come up with your own system to keep your cut pieces together, I use zip lock-type bags or wonder clips depending on the projects. This preparation will make the sewing of your blocks quicker and more effective because nothing is more difficult, and frustrating, than separating forty 2 7/8 inch squares from forty 3 ¼ inch squares.
So much for the organization of the project, now for organizing your sewing room.
Consider forming a triangle between your sewing machine, ironing board and cutting mat. A bit like the stove, refrigerator and sink in your kitchen.
If you have to change room to cut or iron … save your steps and bring them closer to you. If you are right handed I suggest to place the ironing board to the right of the sewing machine and the cutting mat on your left (do the opposite if you are left-handed).
I continue to believe that it is better to cut standing up when cutting strips, but if you have small cuts to make it’s OK to do them sitting down. If this is the case you can also put the ironing board at the same height. A chair on wheels will allow you to move with ease from one space to another.
A last bit of advice: Many make the mistake of doing all the house chores before going to their sewing room. We recommend beginning in the sewing room with a timer set for 30 minutes and you can go do some housekeeping in small doses throughout the day. You will notice that you will have less back pain and your house will be clean at the end of the day.

