 Congratulations!
The piecing part of your quilt is complete, now we must begin the quilting process. As you have regularly used your design wall, you know that there are no excess fabric and the top will hang well on the batting. All that’s left to do before quilting is adding the batting and backing. And this is the 9th step in the 12 steps to successful quilt making.
This is another crucial step in the success of your project. If you’re a bit exhausted, might I suggest you take a break before sandwiching. Hurrying during this step can be catastrophic.
Trick #1: The batting and the backing should have 5 inches extra all around your quilt top.
- Your batting and backing MUST exceed by 5 inches each side of your quilt top to ensure that when quilting, the quilt top can move slightly without missing batting or backing in the process.
- If you do not leave too much excess, it will be difficult to position your layers when making the sandwich.
- One final thing to keep in mind: if all goes wrong and you do not want to quilt your piece, remember that you can always send it to a professional quilter who will need the 5 inches excess to place your quilt on rolls.
Trick #2 : Making the 3 layers stick together
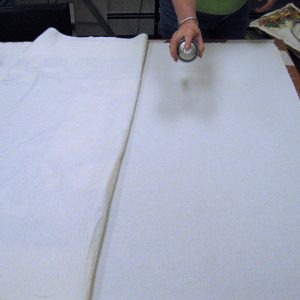
The question is HOW? If you are going to be quilting by hand, you will not have the choice but to baste with needle and thread. However, If you intend to quilt by machine than it is better to use the 505 adhesive spray. But it is to use with caution. You must never forget that you are spraying out glue, so make this step in a well ventilated area. And if you suffer from respiratory problems WEAR A MASK. During my three pregnancies, I refused to use it, not wanting to take any chances (note that this was my personal choice, so you can choose to do so).
 Why use this despite all the warnings? It is fantastic! The pieces stick together very well and we can quilt by machine carefree and all the glue with disappear during the first wash. Customers often ask why I don’t use pins. It’s simple : I do not believe that they work. Yes, I have tried that and I think it is very long to pin the quilt down (especially if you suffer from arthritis) and there is no guarantee that the pieces will lay flat as there still is a 1″ gap in the pins where your fabrics can move.
Trick #3 : Ensuring that all layers are evenly spread, not stretched
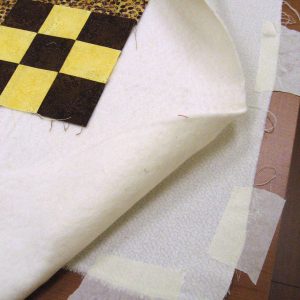
 As I always say in my classroom: Go in your living room and remove the sofas, kids, husband and pets. Once the floor is clean, put the backing fabric (wrong side facing towards you) on the floor and tape with regular 3M 2″ wide masking tape. Ensure that it lays out flat. Then position on top the batting and then the quilt top right side facing up. Make sure that they are all well centered. Fold the batting and quilt top in half and spray glue onto the backing. Layer the batting back in place ensuring that it lays flat (like when installing wallpaper). Spray the glue over the back of the quilt top and layer on top of the batting. Then repeat the steps on the other side of the quilt. Finally, turn the piece and make sure that the backing is nice and flat. If you have bubbles it’s because your backing was not stretched out enough …. If it’s all wrinkled it’s because you have stretched it out too much.
Finally, allow 24 hours before quilting to let the glue dry. This will prevent glue build up on your quilting needle.
If you have already used hairspray you will also understand that it is important to gauge the amount of glue to put on your quilt as if you put too much, it becomes too rigid and is very difficult to quilt.
Have fun!